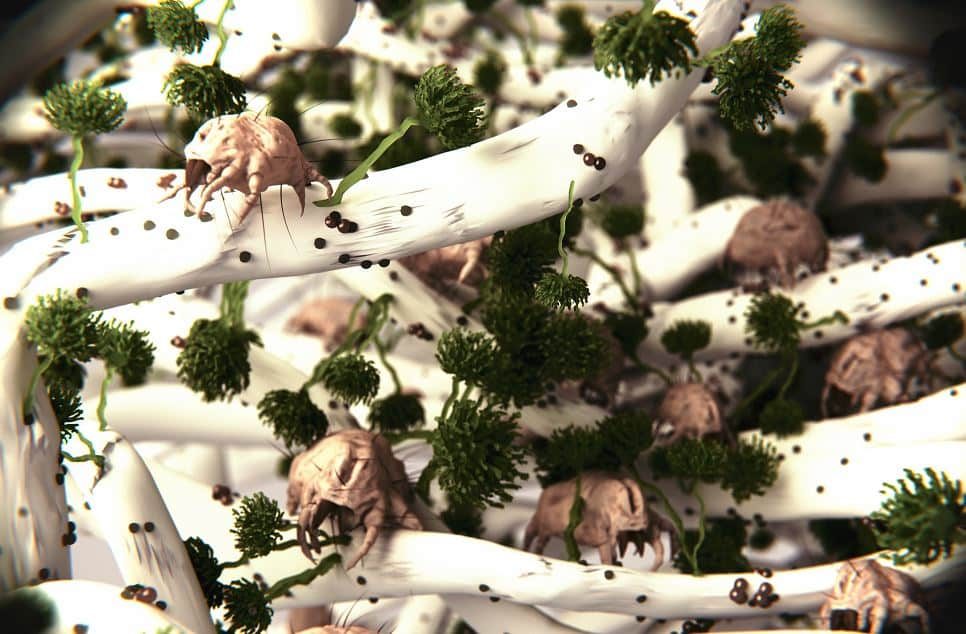
Dust mites are invisible. They are everywhere. You probably cannot see them, but they are living in your bedding right now. They thrive in dust. Your bed is their paradise. If the thought of sleeping on a colony of microscopic bugs makes you sick, you are not alone. You want to kill them. You want clean sheets. You want to win this war.
Here are 12 ways to get rid of dust mites in your bed.
1. Wash on High Heat
Water alone is not enough. You need heat. Dust mites die at high temperatures. Wash your sheets, pillowcases, and duvet covers weekly. Set your machine to at least 130°F (54°C). This temperature is lethal to them. It removes the mites and their waste. The waste is what triggers allergies for most people.
2. Freeze Soft Items
Some things cannot go in the hot wash. Stuffed animals? Throw them in the freezer. Place them in a sealed plastic bag. Leave them there for 24 hours. The cold kills the mites. Once they are frozen, wash them if possible. If not, just take them out. The dead mites will remain. You must remove the debris later. A vacuum helps here.
3. Use the Dryer’s Heat
After washing, dry everything on high heat. The dryer is a weapon. Run it for at least 15 minutes on the highest setting. This ensures any remaining mites are destroyed. It also removes moisture. Mites love humidity. Dry bedding is hostile territory for them.
4. Choose Anti-Allergy Covers
Standard sheets let mites pass right through. You need barriers. Buy encasings labeled “anti-allergy” or “mite-proof.” These covers zip up completely around your mattress and pillows. They trap existing mites inside. They also block new ones from entering. This is a one-time investment that pays off.
5. Vacuum the Mattress
Vacuuming is not enough if you do it right. Use a vacuum with a HEPA filter. Regular filters just blow the allergens back into the air. Go over the mattress surface slowly. Pay attention to seams. Mites hide in the cracks. Empty the canister outside immediately. You do not want to recirculate the dust.
6. Control Humidity
Dust mites need moisture to survive. They absorb water from the air. Keep your indoor humidity below 50%. Use a hygrometer to check levels. If it is higher, use a dehumidifier. Open windows when possible. Good airflow helps. A dry house is a mite-free house.
7. Declutter the Bedroom
Clutter traps dust. It traps heat. It traps mites. Remove unnecessary items from your nightstands and shelves. Keep the space around your bed clear. This makes cleaning easier. It also reduces the surface area where mites can live. Less stuff means less dust.
8. Sunlight Is Your Friend
UV light kills bacteria and mites. If you have curtains or heavy drapes, take them down. Wash them. Or better yet, let sunlight hit your bed. Leave the blinds open during the day. The heat
Air out your mattress in the morning
It starts with the basics. Open the windows. Open the bed covers. Do this for about thirty minutes every day.
Why bother? Because dust mites love humidity. They thrive in the warm, damp microclimate trapped under your sheets. Fresh air changes that dynamic. It brings in cooler temperatures and drier air. Mites hate dry conditions. They can’t reproduce as easily when the environment isn’t a steamy greenhouse.
You are essentially disrupting their habitat. It’s not a cure-all on its own, but it is a necessary first step. If you skip this, everything else you do feels like trying to bail out a boat with a spoon.
Clear out the clutter
Dust mites don’t just live in your mattress. They live in the debris surrounding it. Look around your bedroom. What do you see?
Peluches. Books. Pillows.
These are dust traps. If you have stuffed animals on the bed, move them. Or wash them regularly. The same goes for decorative pillows. If you have a fabric bed canopy or headboard, dust accumulates in those fibers fast. Launder them or have them dry-cleaned.
And those novels piling up on the nightstand? They are likely harboring colonies. Put them away in a closet or bookshelf. Keep the sleeping zone clear. Less surface area means less habitat for the bugs to colonize.
Wash bedding at high heat
Vacuuming helps, but it doesn’t kill the mites. It just removes them from the surface. To actually neutralize them, you need heat.
Wash your sheets and pillowcases once a week. Set your machine to 60 degrees Celsius. That is the threshold. Anything lower might not kill the eggs or the adults effectively. Standard detergent is fine. You don’t need anything fancy here.
If you have severe allergies, look for specialized laundry additives. Some supermarkets carry powders or liquids marketed for sensitive skin or allergen control. They often contain agents designed to break down the protein structures of the mites. It’s a small extra cost for peace of mind.
Vacuum the frame and mattress
Grab your vacuum cleaner. This isn’t just about the floor.
Focus on the mattress. Go over it slowly. Pay attention to the seams and the edges. Then move to the box spring or slatted base. Dust mites hide in the cracks. They hide in the fabric wrapping the springs.
If you have a fabric headboard, vacuum that too. The area near the wall behind the bed is a prime spot for dust accumulation. Vacuuming removes the food source (dead skin cells) and the mites themselves. It’s mechanical removal. It works, but only if you do it consistently. Once a week is the baseline.
Try a diluted alcohol spray
Need a chemical-free boost? Or maybe you want something with a bit of antibacterial action?
Mix 70% alcohol with warm water. Use a spray bottle. A little lavender oil helps with the smell, but it’s not strictly necessary for killing the mites. The alcohol does the heavy lifting.
Spray the mattress and the box spring. Don’t soak them. Just mist the surface. Let it air dry completely before making the bed. The alcohol evaporates quickly, carrying away moisture and disrupting the mites’ cell membranes.
It’s a simple hack. Cheap. Effective. Just make sure you are in a well-ventilated room while spraying. The fumes are strong.
Consider an anti-mite mattress
Sometimes, you can’t control the environment enough. You live in a humid climate. You can’t open the windows in winter. Your allergies are getting worse despite your best efforts.
In that case, look at the mattress itself.
Many brands now offer mattresses treated with anti
7. Seal it in with a protective cover
If your mattress is already showing signs of age, you don’t necessarily need to toss it yet. You can save it by wrapping it in an allergy-proof cover. These aren’t your standard fitted sheets. They are impermeable encasements designed to lock out dust mites and mold spores. They also block humidity, which is the enemy of good sleep.
Think of it as a barrier. If your mattress is several years old, it likely has microscopic debris deep inside the foam or springs. A zippered protective cover traps that debris inside and keeps new allergens out. It is a cost-effective way to extend the life of your bedding, particularly if you or a family member suffers from allergies.
8. Know when it is time to replace your bedding
Five years is the magic number. Most experts recommend replacing your mattress every five years.
Why five?
Because after that timeframe, the materials break down. The foam loses its elasticity. The springs sag. You stop getting the support your spine needs. But there is a darker reason to replace it.
Your old mattress is a buffet for dust mites.
They thrive in the warm, dark environment of a used mattress. If you wake up with back pain, congestion, or itchy skin, your bed might be the culprit. Replacing your bedding is not just about comfort. It is about health.
Go to a specialized store. Test different firmness levels. Do not buy online without trying it first if you have back issues. Your body needs to tell you what it wants.
9. Wash your pillows in the machine
You can wash them.
Most people throw pillows away when they go flat or yellow. That is a waste. Synthetic pillows and natural feather pillows can usually be washed in a standard washing machine.
Here is the trick to actually killing the mites and freshening them up:
- Put the pillow in the drum.
- Add your regular detergent.
- Pour one cup of baking soda directly into the drum before closing the lid.
- Run a normal cycle.
- Hang it in the sun to dry.
The sun helps bleach the fabric and adds extra heat, which mites hate. The baking soda acts as a deodorizer and a mild abrasive. Your pillow will come out fluffy, white, and sterile.
10. Use essential oils for a natural spray
Nature has some heavy hitters in the fight against pests. Essential oils are potent, eco-friendly, and effective. You do not need chemicals if you know what to use.
Mix 10 drops of one of these oils into a spray bottle with warm water:
- Clove oil
- Cedarwood oil
- Tea tree oil
- Lemon oil
- Lavender oil
- Eucalyptus oil
- Palmarosa oil
- Peppermint oil
Any of these work. Clove and tea tree are particularly aggressive against mites. Spray your mattress and box spring lightly. Let it air dry completely before making the bed. The scent will linger, but the mites will not survive the environment.
11. Treat your bedding with baking soda
Baking soda is not just for cookies or cleaning drains. It is a versatile powder that works wonders on fabrics.
Sprinkle a generous layer of baking soda over your mattress.
Let it sit. Do not skip this step. Leave it there for a full day if you can. The powder absorbs moisture and odors. It also helps to disrupt the mites’ environment.
After the waiting period, vacuum the mattress thoroughly. You need to get every bit of powder out. Use the upholstery attachment. This is a simple, cheap, and safe method for every bed in your house.
12. Consider acaricide products
Sometimes natural remedies are not enough. If you have a severe infestation, you might need stronger tools.
Acaricide products are available in most supermarkets and hardware stores. They come in sprays, powders, and liquids. They are designed specifically to kill dust mites and their eggs.
Read the label. Follow the instructions exactly.
Do not guess. These are chemicals. They work fast. But they require proper application to be safe and effective. Apply them according to the manufacturer’s directions. Usually, this involves spraying the mattress, letting it dry, and waiting a specific amount of time before sleeping on it.
It is not pretty. But it works. And if you have tried everything else and the allergies persist, it might be the final step you need to take back your sleep.