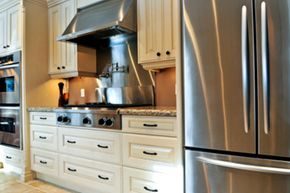
Stop waiting on ice cubes. Stop filling pitchers that take up valuable shelf space. It is annoying. It is inefficient. You want cold water and ice on demand. But buying a fridge with a dispenser and ice maker is only half the battle. You still need to get water into the appliance.
Most people think this requires a licensed plumber. It doesn’t. You can do this yourself. It takes patience. It takes the right tools. But the result is convenience for the life of the unit.
Here is how to hook up a water line to your refrigerator on your own.
Shut Off the Supply and Locate the Source
Start by shutting off the main water supply. Do not skip this step. You do not want a flood while you are working.
Find the cold water source closest to where your new fridge will sit. Ideally, use existing lines. Do not attempt to install new pipes from scratch if you can avoid it. Stick to what is already there. It saves time. It reduces risk.
Drill and Route the Tubing
You need a path for the water. Drill a hole through the cabinet wall. This is the wall separating your under-sink space from the refrigerator area. Or, drill through the basement ceiling up to the fridge.
Use copper tubing. Thread it through the hole.
Attach one end to the refrigerator’s water pipe. You will need a nut and ferrule for this connection. Be precise here. A loose fit causes leaks.
Key Tip: Leave extra tubing coiled behind the refrigerator. You need slack. If the tank ever needs to move for cleaning or repair, you will be glad you left that extra coil.
Connect to the Main Line
Cut the existing cold water line under the sink or in the basement. This is where the water enters the fridge.
Install a copper T-fitting. This splits the flow. One path goes to your sink or previous fixture. The other goes to the fridge.
Attach a water valve to the T-fitting. This valve controls flow and pressure. It is your shut-off switch for the fridge. Put a gasket seal between the valve and the T-fitting. Seal it tight. Water does not forgive mistakes.
Connect the free end of the copper tubing to this valve. Now the path is clear.
Secure and Test
Clamp any exposed tubing inside the cabinets. Keep it along the back wall. You do not want it dangling or exposed to damage.
Turn on the water supply. Watch for leaks. If it holds, you have cold water very shortly.
Wait. Do not rush the ice. You have to wait 1 to 2 hours before the ice maker kicks in and produces cubes. Be patient. The ice will come.
Why This Matters
DIY installation saves money. It also gives you control. You know where the valve is. You know how to shut it off. If there is a leak later, you are not helpless. You can fix it.
Most errors happen at the connections. Tighten the nut and ferrule securely. Ensure the gasket is seated correctly. Check the T-fitting for tightness.
This is not rocket science. It is plumbing. Basic plumbing. With care, it works forever.
Tools You Will Need
You do not