Stone has been holding things together since before we had ink or paper. Look at Britain. There are walls out there from 3500 B.C. Still standing. We have PVC fences now. They are cheaper. They go up fast. But they lack soul. Nothing defines an outdoor space with the same weight and character as rock stacked on rock. Whether you’re on a city lot or a sprawling farm, the appeal holds.
The ingredients are simple. Stone. Gravity. Ingenuity.
Don’t let the simplicity fool you. This is not a weekend hobby. It is a physical and mental marathon. The rocks are heavy. The cost adds up fast. And the planning? That requires more brainpower than brawn. Think about the landscapes of New England or the UK countryside. Those walls have survived centuries. Yours should too. That requires precision. It requires respect for the material.
We are focusing on the dry-stone wall technique here. You might see mortar used in modern projects. Mortar acts as a glue. It fixes stones in place. It is popular for a reason. But dry-stone construction relies almost entirely on gravity. It takes more work. It demands more skill. But the details often overlap. If you master the dry method, you understand the physics of stone.
Planning Before You Lift a Rock
Are you doing this alone?
We assume so. The info below will help whether you have a crew or not. But let’s talk money first. Transporting stone is expensive. A paid contractor might actually be the cheaper option compared to buying and moving tons of rock. A short wall can cost thousands in materials alone. It depends on where you source it. You probably already calculated that. But don’t forget the time.
Even the best dry-stone masons only build about 3.2 yards (3 meters) of wall per day. That is slow work.
Location matters more than you think. Check your zoning laws. Get your licenses sorted. Then look at your neighbors. If the wall goes on the property line, make sure you have an agreement. You don’t want a dispute over who pays for the next century of maintenance.
Use local stone. It looks right. It saves money on hauling. But there is a deeper reason. Local stone weathers to match the local climate. It ages gracefully.
Survey the land itself. Watch out for young trees. Their roots are invisible now but will be massive later. They will push against your wall. Watch the slope. Even a subtle grade changes how the wall settles. Gravity is the boss. Whether you use mortar or not, you are fighting or leveraging gravity. Stone walls are in constant, slow motion. How you build it today sets the trajectory for the next five hundred years.
Sourcing the Right Material
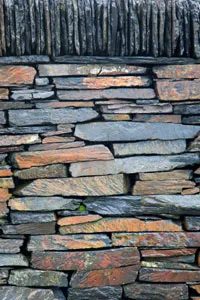
Choosing the right rock is the difference between a wall that stands for centuries and one that crumbles in a decade. For a dry-stack project, you need stone that splits flat. Shale, slate, and schist are your best bets because they naturally break into long, flat angles. Flat tops and bottoms are non-negotiable. They lock together. They provide stability. Without them, you’re just stacking irregular bricks waiting to topple.
Avoid igneous rock. Granite or basalt might look rugged, but their formation creates chunky, irregular shapes that fight you during construction. They don’t settle well. If you absolutely love the look of igneous stone, stick it in a mortared wall. Mortar does the heavy lifting of filling gaps. In a dry wall, it’s just a headache.
Sedimentary rocks are a smarter play. Limestone and sandstone are softer, which sounds like a weakness but is actually an advantage. You can carve and shape them to fit. They compress under time and gravity into configurations that work for building. Don’t let “softer” fool you into thinking they’re weak. Sedimentary structures have lasted thousands of years. They endure.
Climate dictates your choice. Wind blowing dust across a plain will sandblast limestone into dust over time. That’s a slow erosion. A volatile climate with freeze-thaw cycles is different. Softer stone handles it better. It flexes. It’s less likely to crack when water inside it expands and contracts. Harder, brittle stone shatters. Mind the local conditions. Your wall’s lifespan starts with understanding what the weather will do to it.
Planning the Layout
Gravity is your enemy and your ally. Once you clear the site, look at the land. Water flows downhill. If your wall blocks it, you’ll have pressure building up behind it. That pressure wins. Always plan for drainage first.
Define the parameters. Length. Thickness. Corners. Gates. Get exact. Precision isn’t just aesthetic; it’s structural. Consider your plumb line. If it sags in the wind, your wall curves. A curved wall built by mistake creates uneven stress points. It will tear itself apart from the inside out.
Want a curve? Plan it. Lay a thick garden hose or rope on the ground to mark the trench for your first course. Build the curve into the foundation. Then build the wall to match. Don’t wing it.
The Rules of Scale
Height changes everything. There is a massive structural difference between a 3-foot wall and a 7-foot wall.
For walls under 3 feet (0.9 meters), the base should equal the height. A 3-foot wall gets a 3-foot base. Simple.
Walls over 3 feet need more mass. Add 8 inches (20 centimeters) of width for every foot of height. A 7-foot (2.1 meter) wall needs a base of at least 4.6 feet (1.4 meters). This isn’t advice. It’s physics.
Think about permanence. Half the job is remembering that this thing is supposed to outlast you. The taller the wall, the deeper it goes.
For walls above waist height, dig a trench at least 2 feet (61 centimeters) deep. Go deeper if your frost line is lower. Frost heaves walls. They push up and down. If your dry stone wall is sunk deep, moisture can pass through the tiny gaps in the structure. The ground moves, but the wall moves with it.
Shorter walls don’t need that depth. An 8-inch (20 centimeter) trench is usually enough. Let gravity settle the stones. They’ll find their own balance.
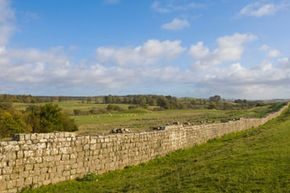
The Footer: Laying the Foundation
Stop guessing. Start measuring. You’ve got your plan, your pile of stone, and your tools, but before you lift a single rock, you need to define the footprint. Don’t just eyeball it. Drive stakes into the ground along the outside edge of where that wall will live. Two stakes for every yard of length. Make them tall—taller than the final wall, because you’re going to be re-tying your guide string as the structure grows. Tie that twine tight. About a foot off the ground to start. If it sags, the wall will sag.
Now, dig the trench.
The Footer Stones
This is the part that matters most. Gravity is the only engineer you have, and it doesn’t care about your aesthetic preferences. It pulls straight down. Always.
Lay in your “footer” stones first. These are the ugly ones. The heavy ones. The ones with weird angles and rough edges. Bury them. Since they’re going underground, you don’t need them to look pretty. You need them to be stable.
Space them out by a few inches. Not flush. Leave gaps for drainage. Fill those gaps with smaller rocks if you have to. And if you can, arrange them to create a shallow V-shape running down the center of the trench. Why? Because this sets up the support system for the courses above. The higher stones will push against each other from the outer sides, locking into that central spine. It’s physics, not magic.
If you’re building a mortared wall, this first layer gets a concrete pour. Full slab. And you need rebar—reinforced steel rods. Plant them at six-foot intervals, standing as tall as your finished wall. If you’re doing a dry-stone wall (no mortar), you can skip the rebar and maybe even skip the concrete if you’re a purist. But a little concrete here doesn’t make you a traitor. It makes your wall last longer.
Above Ground
Once the footer is set, the real work begins.
You’re going to build up. Course by course.
Keep that string line tight. Check your level. Every stone needs to sit flat. Not tilted. Not wobbling. If it wobbles, it’ll fail.
Start with the heaviest stones at the bottom. Work your way up. Use smaller stones to shim and lock things in place. Backfill behind the wall as you go—don’t wait until the end. If you backfill later, you’ll have to dismantle part of the wall to get the dirt in. That’s a waste of time and energy.
Use your masonry hammer to shape stones that are too big. Chisel off the rough bits. Test the fit. Dry fit before you commit. If it doesn’t fit perfectly, it doesn’t belong there.
And remember: settle. The wall will settle. It’s going to shift slightly over time. That’s why you leave those gaps in the footer. That’s why you build it with gravity in mind, not against it.
Don’t rush the footer. The rest of the wall is just following what you lay down. If the bottom is solid, the top will hold. If the bottom is weak, everything above it is just waiting to happen.
So, back to that pile of stone. Pick up the heaviest one. Find the spot. Drop it in. Check the level. Repeat.
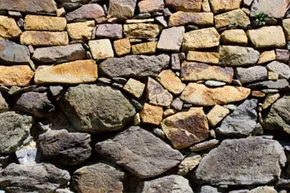
Setting the Foundation Course
Lift your guide lines to match the height of your first layer. Aim for the average size of your thickest stones. Save the prettiest, most uniform stones for the top. It matters more to move the heaviest rocks now. Lifting them later is a back-breaker.
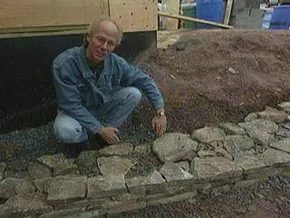
Place these heavy stones in parallel lines along the trench edges. Fill the middle with less perfect stones. Keep that internal V-slope if you can. You need a flat outer surface. More importantly, you need flat tops for the next layer. If you are dry-stacking, watch the vertical face. Don’t let stones stick out weirdly. Gravity will find them. Stability beats style here.
Level and stable is the goal. Knock off wobbly bits. Dig chips out of the stone beneath. Don’t shim them with smaller rocks. Pebbles are temporary fixes. They fall out as soon as you walk away. Use them only inside the wall. For mortared walls, you cover the course anyway. If a stone is great but flawed, score the bad bit with a chisel. Break it off. Keep the score line a half-inch or less.
Every 6 feet, lay a “tie” stone. Place it crosswise, not parallel. This binds the wall. It presses down on the stones below. It brings both sides together. Without ties, you have two half-walls. With ties, you have one structure. They get more important as you go up.
Layering the Structure
Move your guide lines up. Repeat the process. Place tie stones at the same intervals. Use the unevenness of the layer below to create a flatter surface for the next. Watch your guide lines closely. If it’s worth doing, do it right.
Now that you are past the footer, watch for vertical holes. Splits between stones are “joints.” Joints that line up vertically are “runs.” Runs are bad. Even with ties, they weaken the wall. Cover a big stone with two smaller ones on the next level. Use larger stones to cover more joints. Follow this on the exterior. Keep it in mind for the interior. A run through the middle can pull sections down.
Finishing the Build
Corners, edges, and the top need uniformity. Treat corners as the most important tie stones. They are exposed. They hold the interior bits in place. This is key for mortared walls. The structure relies on these anchor points.
Capstones go on top. Make them long, flat, and uniform. Use the stones you saved. Keep the weight reasonable. Don’t risk injury. Avoid uneven weight stresses. But this is where you can have fun. You aren’t supporting courses above.
Maintenance matters. Gravity works slowly. Issues may take time to show. But building with your own hands makes repairs simple. You know how it’s put together. A cracked mortared wall needs mortar. A dry-stone wall needs stacking. It’s straightforward.
Modern Alternatives
Don’t want to hunt for perfect stones? Concrete-cast wall systems interlock. They remove the guesswork. They keep a rustic look. They save time.