
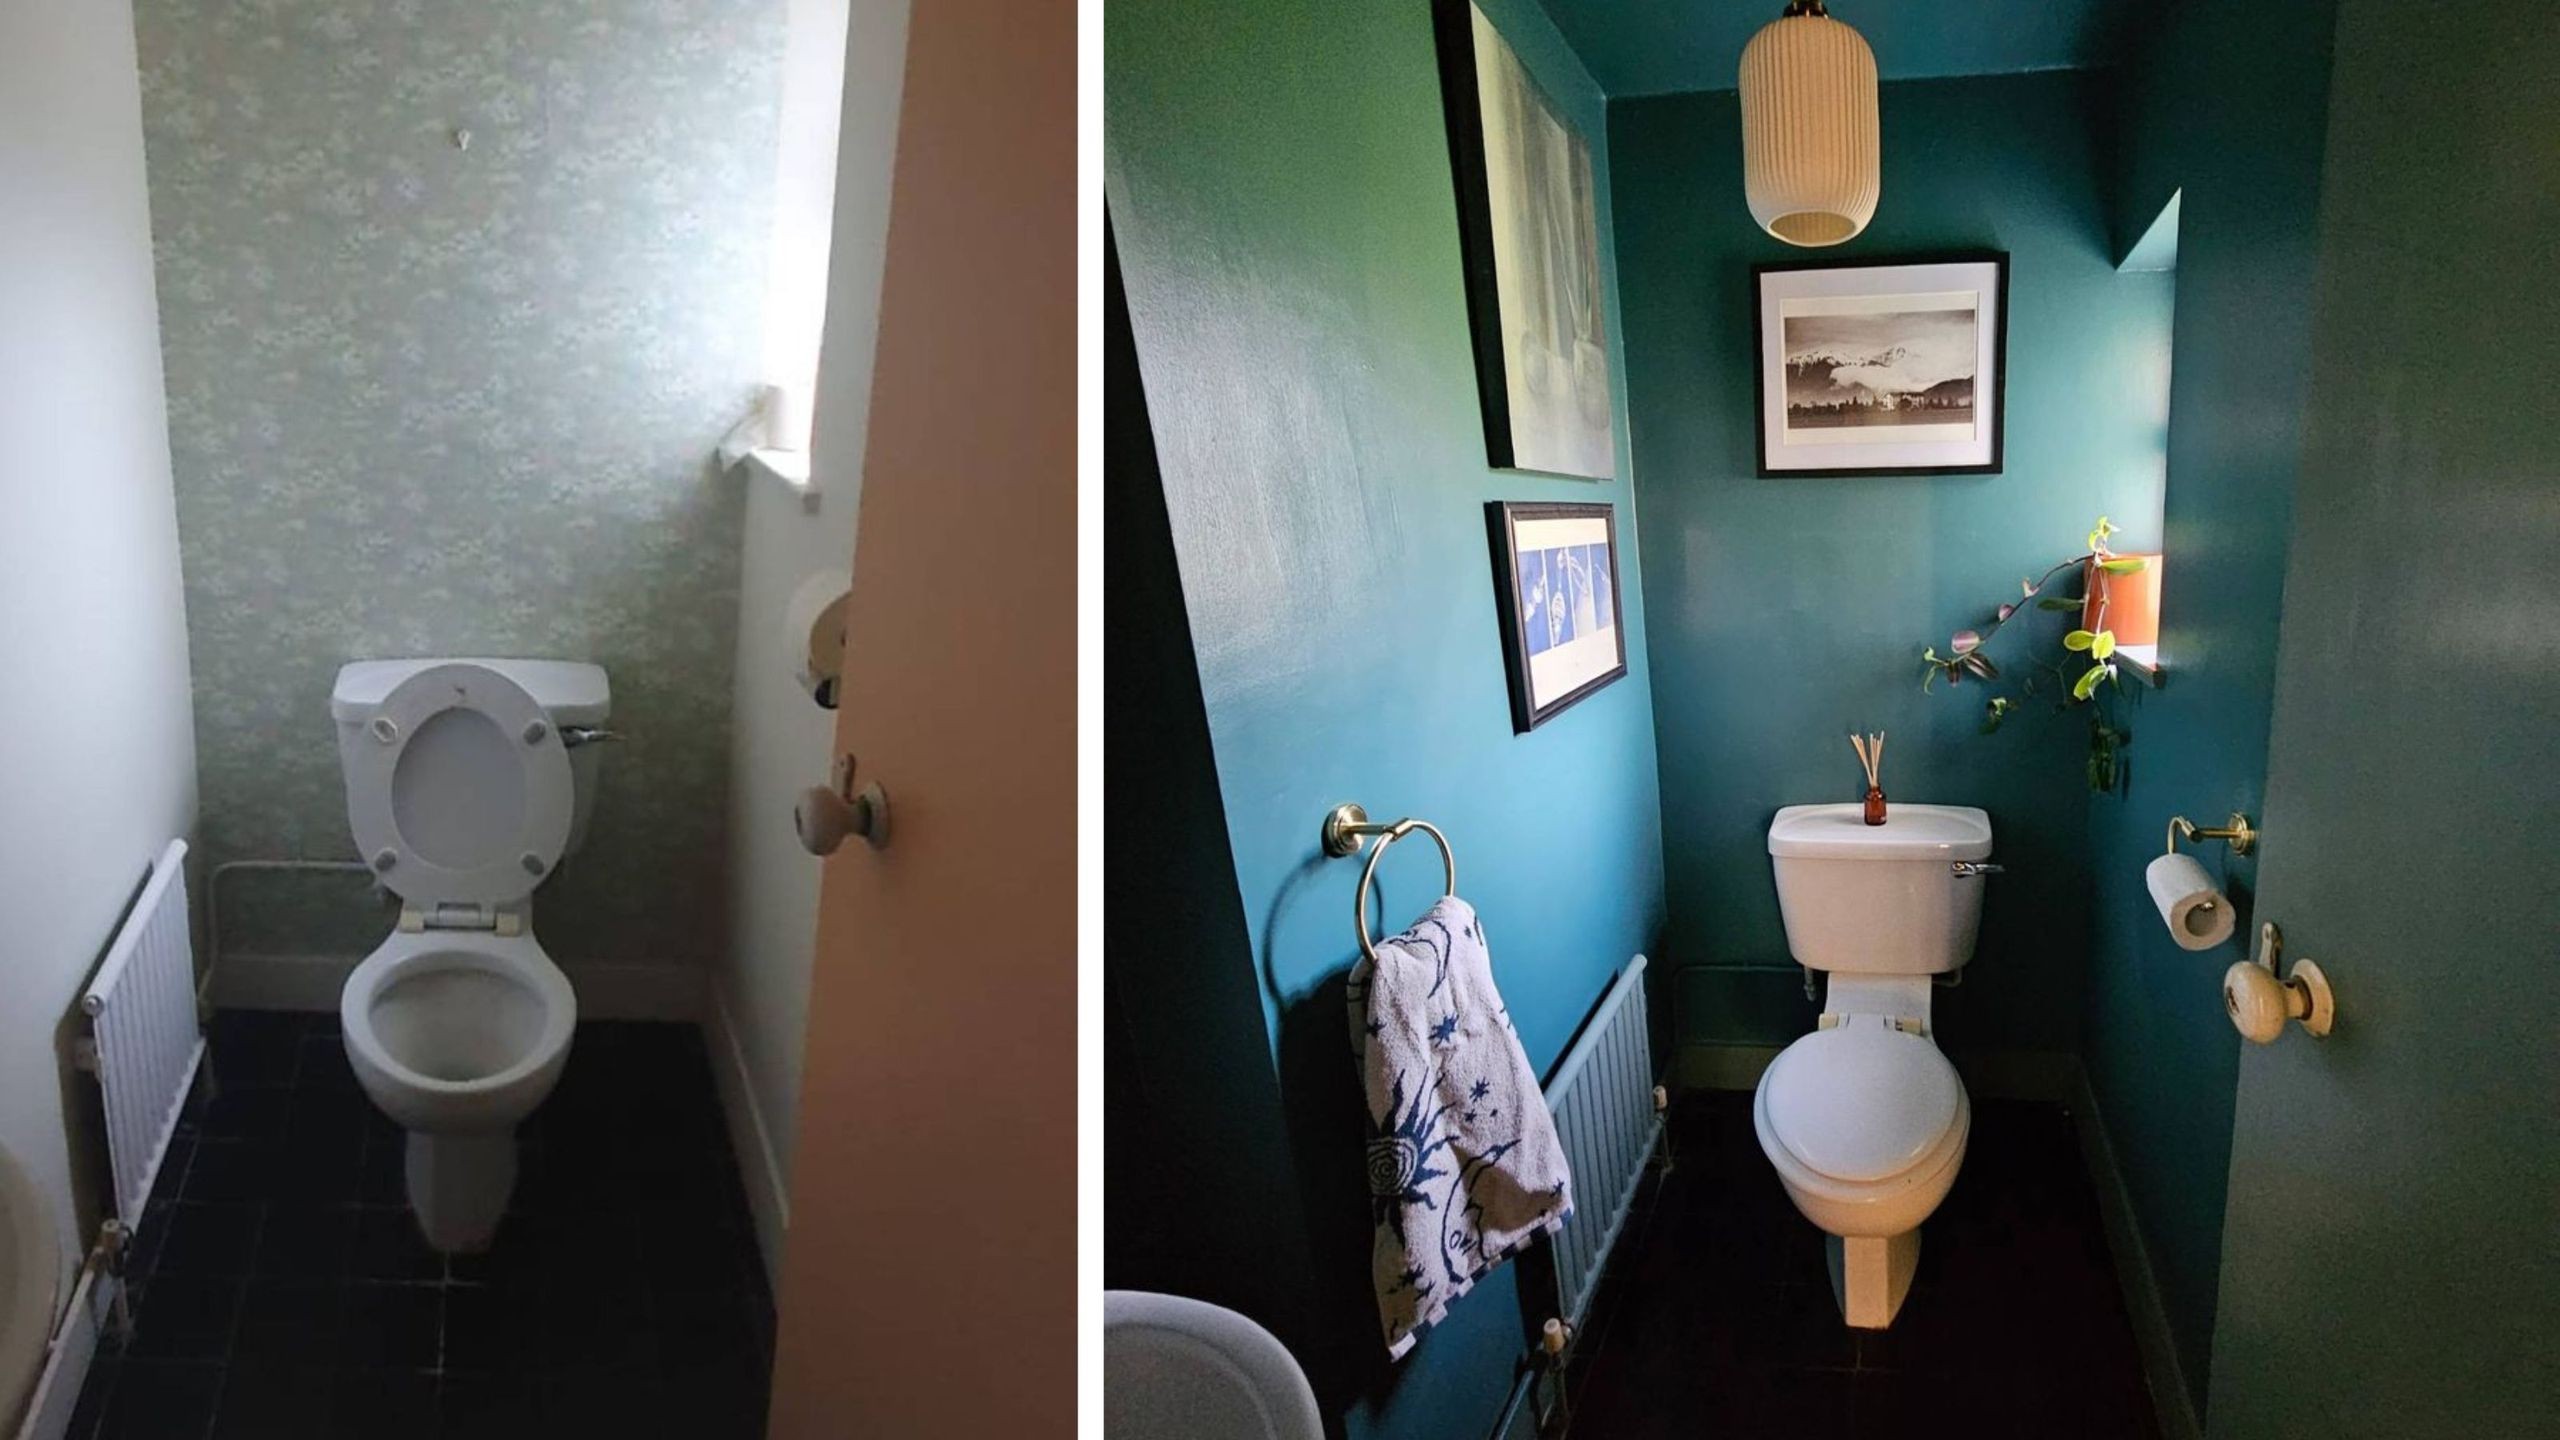
Renovating a home often involves prioritizing high-impact rooms like kitchens and master bathrooms, leaving smaller spaces to gather dust. However, a neglected downstairs cloakroom can become a visual eyesore that detracts from the overall aesthetic of a property. For one homeowner, transforming this 2-square-meter space was not just about aesthetics but about completing a broader renovation narrative.
By leveraging leftover materials, strategic paint choices, and a willingness to tackle minor plumbing issues, the owner modernized the room in just three days for a total of £150. This project demonstrates how small, often overlooked spaces can be revitalized with minimal investment, provided one is willing to put in the manual labor.
The Strategy: Budgeting Through Resourcefulness
The key to keeping costs low was resource maximization. Rather than buying new materials, the homeowner utilized scraps from previous renovation projects. This approach not only reduced expenses but also minimized waste.
- Paint: Instead of purchasing a specific shade, existing paints were mixed to create a custom warm, deep navy.
- Tiles: Leftover tiles from the main bathroom remodel were repurposed for the splashback.
- Flooring: Second-hand floor tiles were sourced from Facebook Marketplace.
This strategy highlights a broader trend in DIY culture: the shift from “new is better” to “creative reuse.” By viewing leftover materials as assets rather than waste, homeowners can significantly reduce the financial barrier to entry for home improvements.
Day 1: Preparing the Canvas with Paint
The first step involved stripping the room of its dated decor. The walls, part of a 1970s extension, featured concrete render rather than gypsum plaster. This proved advantageous; despite the decor being untouched since the late 1990s, the walls remained in excellent condition with minimal chipping.
The Process:
1. Preparation: Wallpaper was removed, and walls were sanded. A sugar soap solution (£3.50) was used to clean residue and dust. While tedious, this preparation is critical for ensuring paint adhesion and longevity.
2. Color Drenching: The small 2m² space was painted in a single, deep navy color, including the ceiling. This technique, known as “color drenching,” creates a cohesive, impactful look that makes small rooms feel intentional rather than cramped.
3. Woodwork: The woodwork was painted in Green Smoke by Farrow & Ball, an accent color already present throughout the house, ensuring visual continuity.
Cost & Time: £41 | 3 hours
Note: The emphasis on preparation—sanding and cleaning—underscores a common DIY lesson: the quality of the finish is directly proportional to the quality of the prep work.
Day 2: Tiling the Splashback and Floor
With the walls dry, attention turned to the sink area. Although the cloakroom is used infrequently, watermarks on the bare walls were a persistent annoyance. Installing a splashback was a practical solution to protect the walls and enhance the room’s polished feel.
The Process:
* Adhesive and Grout: An all-in-one grout and tile adhesive was used for simplicity and cost-effectiveness.
* Installation: Leftover tiles were applied using a “back buttering” technique (applying adhesive to the back of the tile) for extra grip. Rough edges from cut tiles were placed on the inside to maintain a clean exterior finish.
* Flooring: The original black tiles, though worn after decades of use, were replaced with second-hand tiles found online for £10.
Cost & Time: £17 (tiles/adhesive) + £10 (flooring) | 2 hours
This step illustrates how minor functional upgrades, like adding a splashback, can prevent long-term maintenance issues and improve hygiene.
Day 3: Upgrading Fixtures and Fittings
The final day focused on hardware, which often provides the highest visual return on investment. The warm undertones of the navy paint called for brass fixtures rather than the existing chrome, creating a more modern and cohesive look.
The Process:
* Hardware: Towel and paper holders were swapped out. This simple change, combined with the new paint, dramatically altered the room’s feel.
* Lighting: A pendant light on a short cable was installed to provide adequate illumination without encroaching on headroom in the small space.
* Plumbing Challenges: The tap replacement proved more difficult than anticipated. The previous owners had soldered the old taps in place, requiring the homeowner to replace the pipework entirely. This unexpected complication added time and complexity but was necessary to complete the update.
Cost & Time: £72 | 2 hours 40 minutes
This phase highlights the unpredictability of renovating older properties. Hidden issues, such as poorly installed plumbing, can arise, requiring flexibility and additional effort.
Conclusion
This project proves that a neglected cloakroom does not require a major renovation budget to be transformed. By combining strategic paint choices, resourceful material reuse, and careful attention to fixtures, the homeowner achieved a modern, cohesive look for just £150. The result is a space that feels intentional and stylish, demonstrating that even the smallest rooms deserve thoughtful design.


